Need help in the process of creating your own WordPress theme?
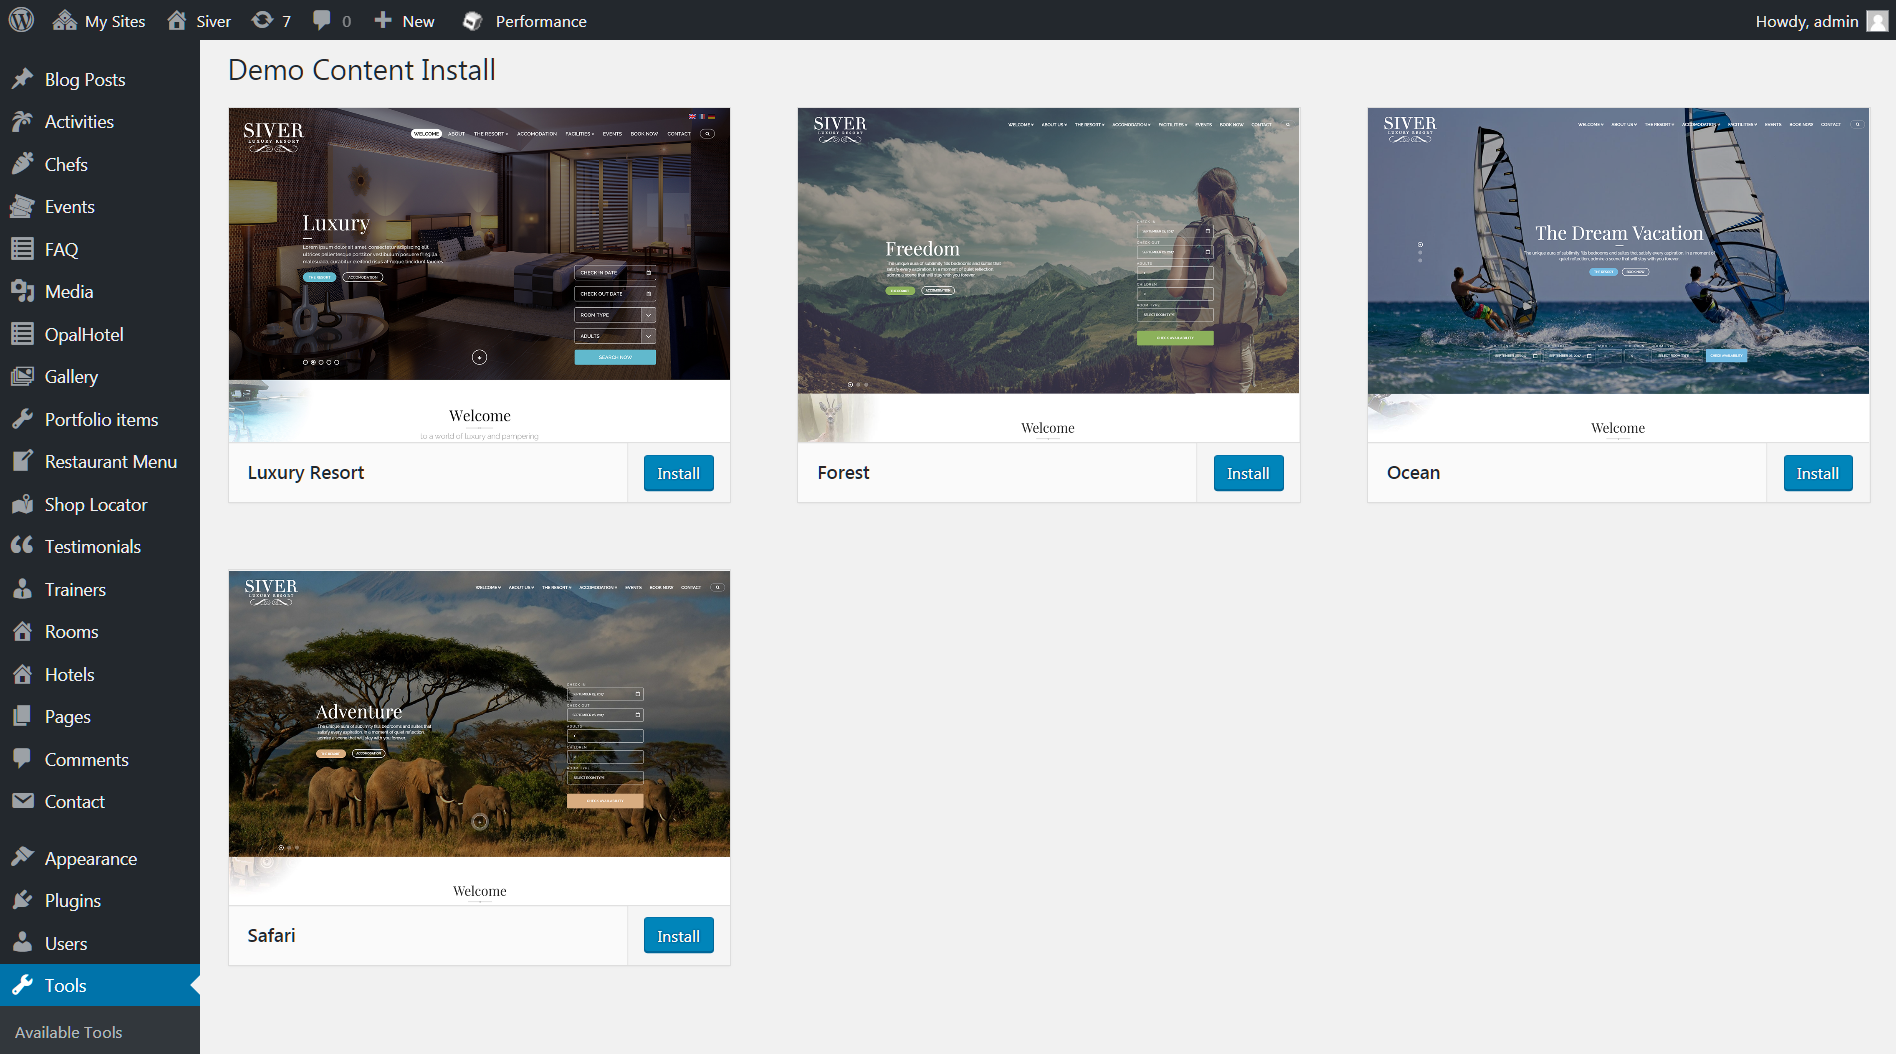
When users install a theme, they should have the ability to install a demo content (settings, pages, images, colors) which comes with the theme. Below, there is a screenshot of demo content install screen from Siver theme which uses framework built-in extensions “Backups” and “Demo Content”.
In this theme, there are 4 demo contents to choose from. Usually, one demo content is put inside a package (local) and the others are downloaded from external server (remote) for the sake of the package size which should be less than 100MB.
Local demo content resides inside a theme package, but not in theme files on git repository. In this section, there will be two topics:
- How to set local demo content in a package
- How to move content from p(h)inky to demo site
To set a local demo content:
Choose a name for your demo content, eg. forest-onepager, example-multipager, default
Create a folder inside theme/demo-content directory, eg. wp-content/themes/projectname/theme/demo-content/example-onepager
There, create (or copy from boilerplate) files: manifest.php, screenshot.png. You should have this structure now:
wp-content/
├-themes/
  ├-projectname/
    ├-theme/
    │  │--demo-content/               # Put all demo content manifest and screenshot. The content itself should be autogenerated.
    │  │  │--example-onepager/        # Local demo content directory, demo files will be generated here
    │  │  │  │--manifest.php          # Demo content name, image, preview link
    │  │  │  │--screenshot.png        # Thumbnail made by graphic designer
Configure demo content name and preview link in manifest.php, as in the example below:
Gid add and commit files. That’s all. Don’t put content files here. The build will add them to the package.
If at this point you don’t have content on demo site yet, first proceed with “Move content from p(h)inky to demo site” section below, then go back here
Go to your theme demo page admin (if it’s a multisite, choose the site which content you wish to export)
Install and activate your theme demo plugin (if not already)
Go to Demo settings menu screen. It should look like this:
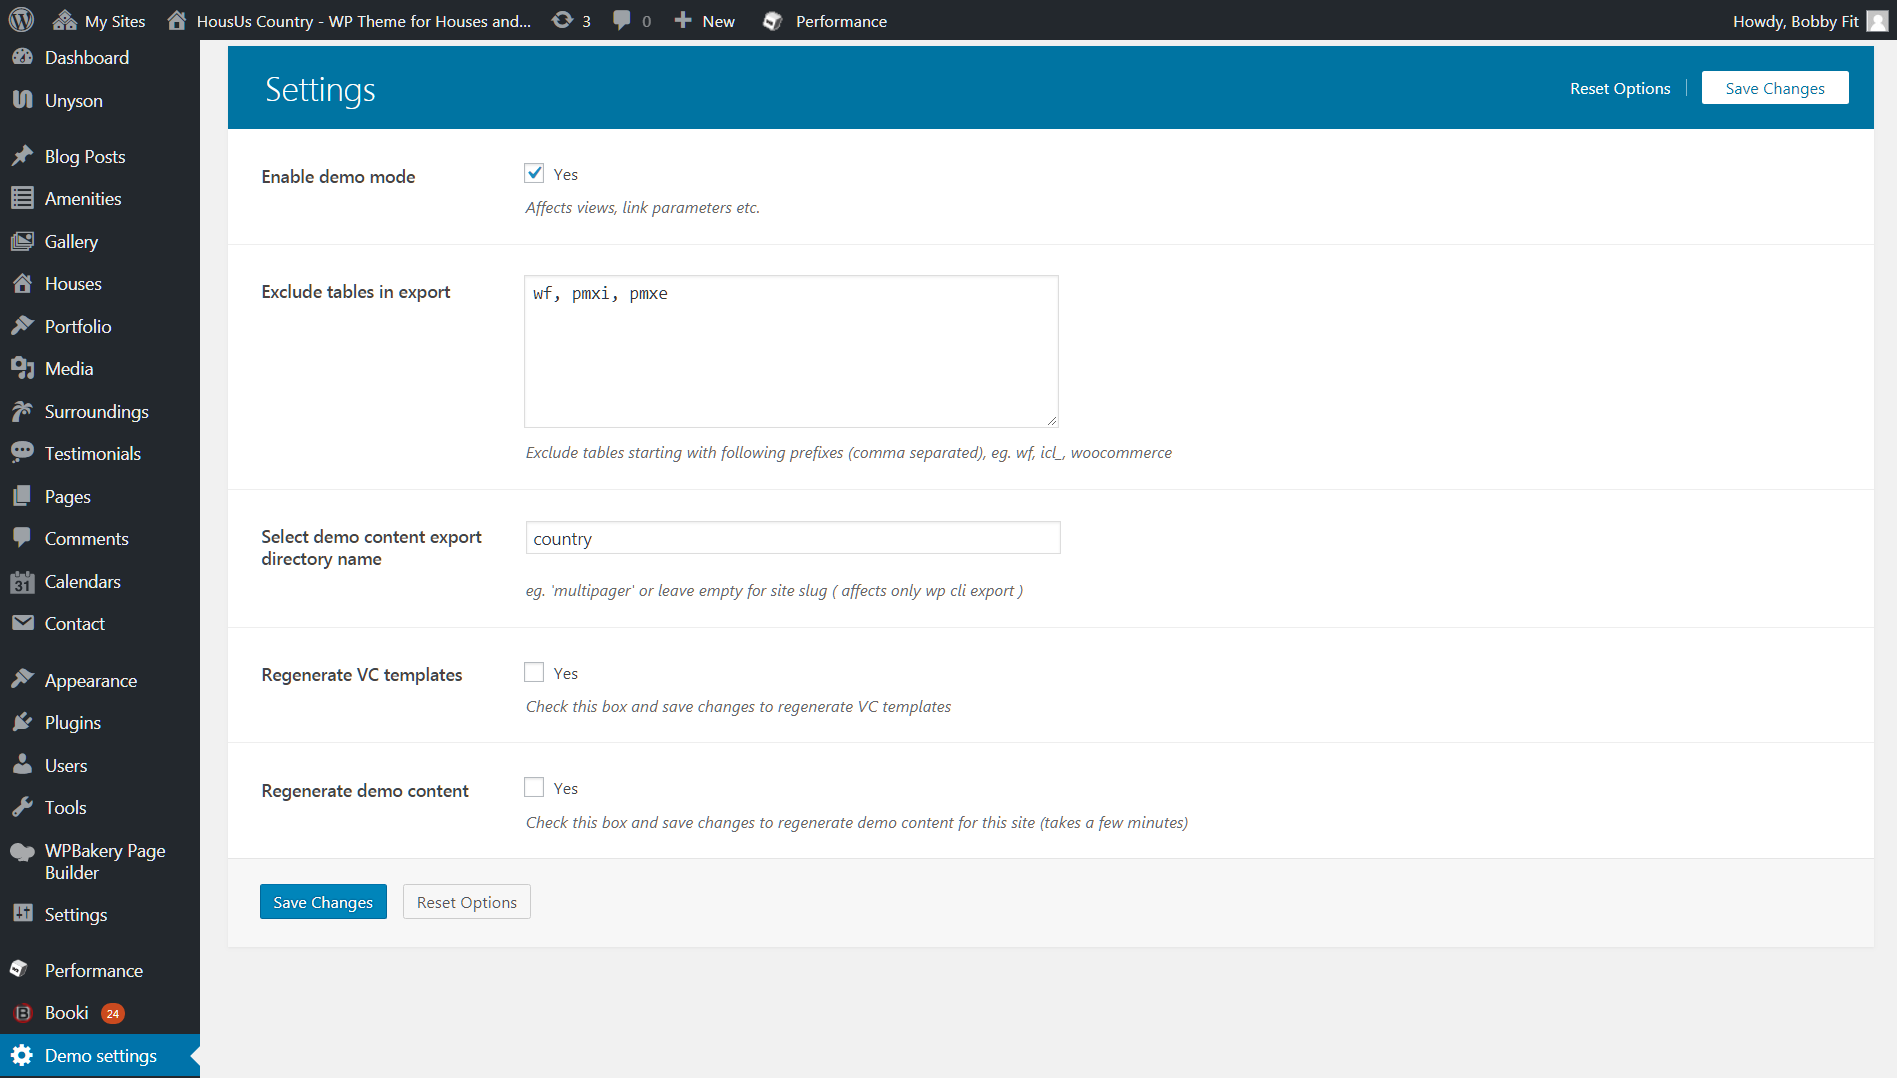
Enter your demo content export directory name and press save (you can leave the other options intact)
That’s all. If your build is properly configured, the demo content will be regenerated with each package build.
If your demo site has yet no content, you will need to export it from your p(h)inky and send to demo via git. Follow these steps:
Set local demo content as described above (the one you wish to move to demo)
Go to your p(h)inky admin (to the site where you have content you wish to move)
Make sure you have enabled “Backups” extension in Unyson menu
Go to to Tools -> Backup and press “Create Content Backup Now” as in the screenshot

Once it finishes exporting, download the backup zip
Extract contents of the zip to your local demo content folder, so you have this structure
Structure: .. code-block:
wp-content/
        ├-themes/
            ├-projectname/
                ├-theme/
                │  │--demo-content/
                │  │  │--example-onepager/
                │  │  │  │--f/                    # Demo content images
                │  │  │  │--database.json         # Demo content settings
                │  │  │  │--manifest.php
                │  │  │  │--screenshot.png
For sake of package size, most of demo contents are put remotely on a theme demo site server.
First, you need to set up remote demo content download path.
Edit file wp-content/plugins/theme-plugin/extensions/backups/config.php
Find the variable $cfg[‘remote_demo_url’] (or create it at the end) and set a proper path, ie.
/** Remote demo content download link */
$cfg['remote_demo_url'] = 'http://THEMEURL/wp-content/plugins/THEME-DEMO-PLUGIN/vendor/bumblebee/theme-demo-plugin-core/extensions/ct-demo-content/includes/remote-demo-content/download.php';

/** For example
$cfg['remote_demo_url'] = 'http://housus.themeplayers.net/wp-content/plugins/housus-demo-plugin/vendor/bumblebee/theme-demo-plugin-core/extensions/ct-demo-content/includes/remote-demo-content/download.php';
*/
Edit file wp-content/plugins/theme-demo-plugin/config.php.
Find the variable $cfg[‘remote_demo_content_directory’] and set proper path, ie.
/** Remote demo content download link */
$cfg['remote_demo_content_directory'] = '/themes/PROJECTNAME/themeforest/demo-content';

/** For example
$cfg['remote_demo_content_directory'] = '/themes/siver/themeforest/demo-content';
*/
Commit.
Then, create a remote demo content:
- Set local demo content as described above
- Change the name of manifest.php to remote.php (indicating this demo content will be a remote one)
- Add this demo content to remote demo contents list in build.properties file
- Commit
- That’s all